How to plan a tiling ride
Before the ride
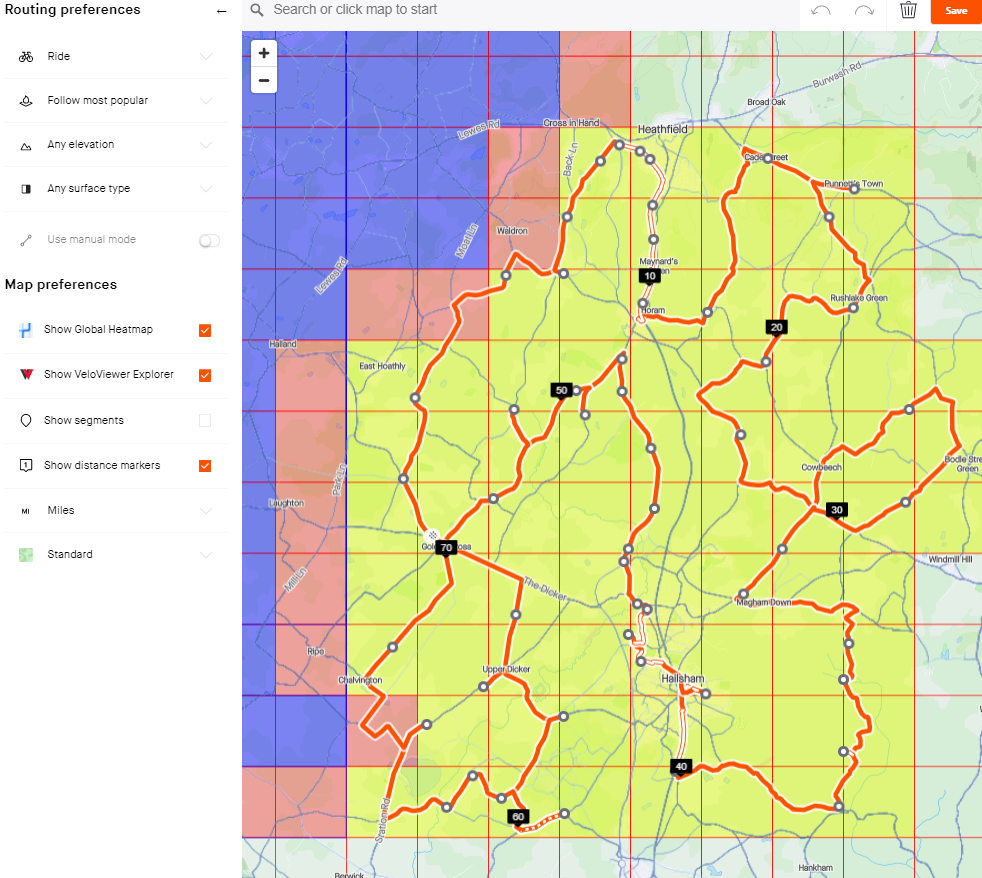
A tiling ride being planned on the Strava route planner with the Chrome extension enabled.
The current best way to plan a tiling ride is to use the Strava route planner with the VeloViewer extension for Google Chrome enabled. The downside to this approach is that Strava made the route planner a Subscriber-only feature in May 2020 so it will cost you $, £ or €. For me the cost is £48 per year. Here's Strava list of benefits of having a subscription. For me it's worth it because cycling is my main hobby, but your mileage may vary.
The VeloViewer extension for Chrome though is free and is excellent. If you are using Google Chrome or newer versions of Microsoft Edge you can install it from this page.
Make sure you are signed into VeloViewer and have updated so that all your rides are processed. This ensures that when you plan your ride in Strava, all your already-visited tiles will show correctly. Then, plan your ride as normal. As your ride passes through a tile, that tile will become coloured. The default colour is a dazzling yellow/green, which I like, but you can customize your own. Existing visited tiles and existing parts of your cluster also have their own colour.
The Strava global heatmap is now integrated into the route planner. This gives you a very good idea of the best routes into a tile. The heatmap tends to obscure the underlying map though so I tend to toggle it on and off to determine the underlying surface type. The heatmap includes the data of mountain bikers and (I think) people on foot, so it is handy to have two further tabs open to help you determine the best route:
| Google Maps | Holding the little yellow man shows the roads for which Streetview information is available in blue. If a road is enabled in Streetview it almost always means the road is public and tarmac - perfect! |
| rowmaps.com | (UK-specific). This site highlights all public bridleways and footpaths on a Bing or OS map. These are the best option when there are no public roads in a tile. The best combination is a public bridleway on a (private) road as these are easy to ride on. Use Google Maps in satellite mode to try to figure the quality of a riding surface. Technically you can't ride on footpaths - they are for pedestrians. So you have to be prepared to walk on such routes and are thus best avoided unless there is no other option in the tile. |
Once you are done, click save on the ride. You will need to get the route onto your GPS device. For Garmin devices, you need to enable syncing of courses from Strava in the Garmin Connect app and you also need to "star" the route in Strava to make it a favourite. There are full instructions here.. I also quite like the old-fashioned option of clicking "Export TCX" and then copying the downloaded file into the "New Files" directory of my Garmin as it shows in Windows Explorer.
The instructions for setting up syncing of routes to Wahoo devices is here.
A free route planning option
Next head to brouter.de. Click "Load" and then "Tracks". Select the KML file you just downloaded from VeloViewer. The map will be overlaid with tiles that are near your max cluster but not IN your max cluster - perfect for planning a ride to expand that cluster. The route planner is pretty nifty and even has features that Strava does not such as colour-coding the route to highlight climbs. Click "Export" to save the route to a .GPX that that you can then import into your device.
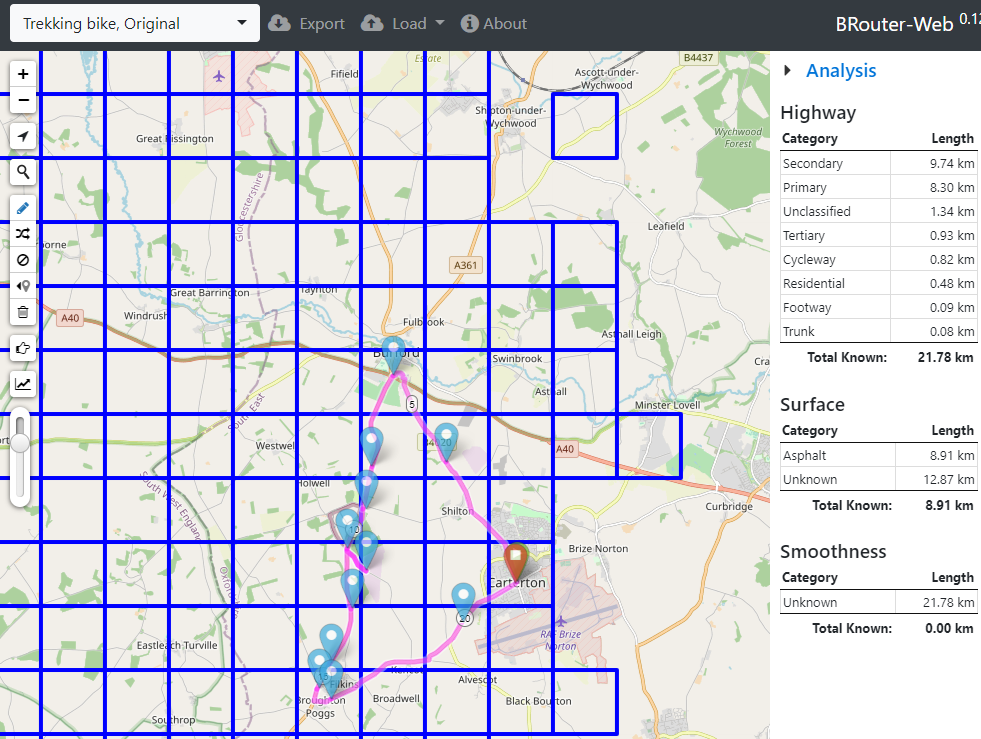
Using BRouter to plan a ride with unvisited tiles overlaid.
During the ride
Once you are on your ride, it's a simple question of following your route to ensure that you get all your tiles, right? Well, matters on the ground don't always match the map so it is very handy to have a tool that gives you confidence on the ride that you have entered a tile. For this I use a Garmin Connect IQ app called EveryTile. It adds a data field to your Garmin device that plots which tiles you've been to as you ride. Unvisited tiles are shown as red blocks, tiles visited on previous rides are shown in light-green and tiles from the current ride are shown in bright green.
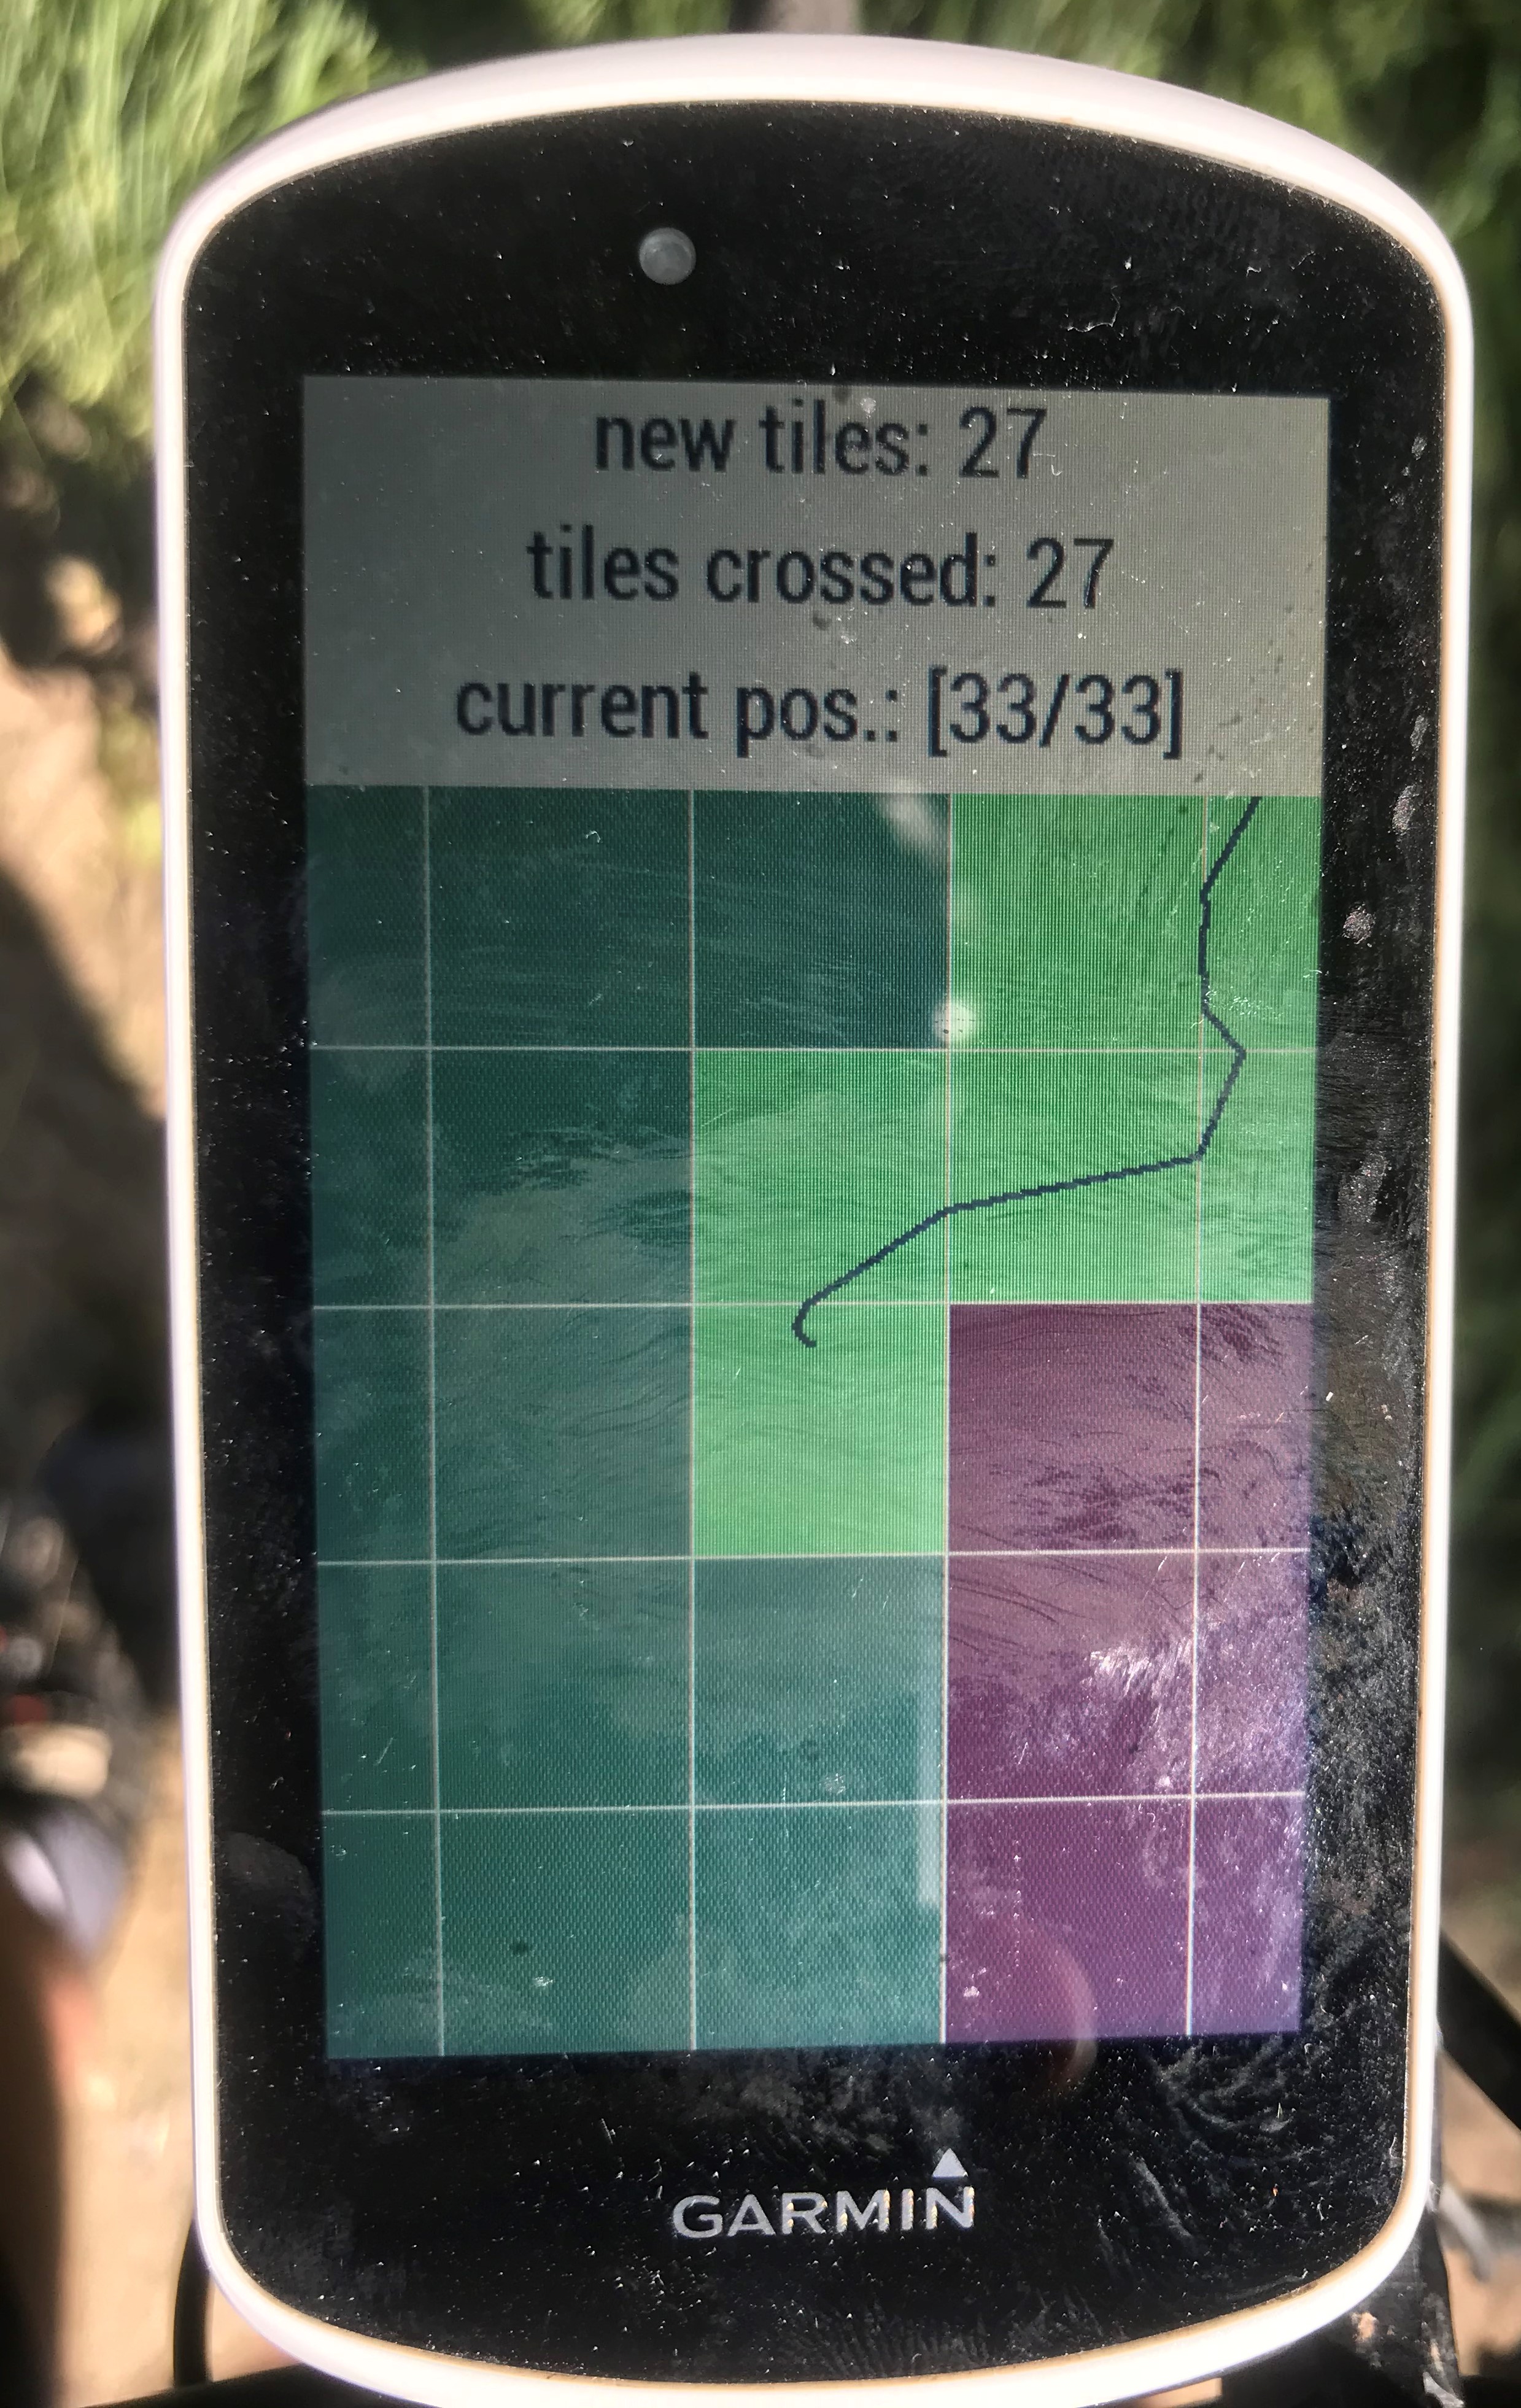
The 'EveryTile' app on a Garmin during a ride.
EveryTile is advertised as working with the Edge 520, 530, 820, 830, 1000 and 1030. I've had personal experience with the 820 and 1030 - it worked well with both.
To install the app, connect your Garmin to a computer via USB and make sure it is connected in the Garmin Connect app. Then header to the app in the store If you are logged in to the website and the device is connected, simply clicking download should cause the app to be synced on to the Garmin.
The exact details of how to get the new field to show up depends on your device. For the Edge 1030, from the home screen click the three horizontal lines in the bottom left, then choose 'profiles', then choose a profile to edit - maybe you even want a "tiling" profile? Then click 'Data Screens', then 'Data Screen' then scroll to the bottom and click 'Connect IQ' and tick 'EveryTile'. Save and edit the new screen so that there is only one field on the screen - the EveryTile field.
After the ride
So you've safely rolled to a halt, clicked stop and save on your Garmin or Wahoo. Upload the ride to Strava by your preferred method. Then Update in VeloViewer. Your new tile count, max square and max cluster will be shown in the summary tab. Click on 'Activities' with the map view enabled to see the difference the ride has made to your cluster.
WHAT IF A TILE IS MISSING? Sometimes a tile that you're sure you visited doesn't show up in VeloViewer. If this happens, don't panic! The initial update from Strava to VV does a quick and dirty calculation of the tiles visited. Often this calculation is enough but sometimes it can miss out a tile, especially if you just skirted along the edge of it. If you just click on the ride in the map to the view for that specific activity then VeloViewer knows you're interested in that ride and will do a more detail analysis of the tiles behind the scenes. If you know refresh your activities map, the tile should have magically been filled in.
You can check whether the "full" analysis has been for a ride by switching to the list view for activities. If you scroll to the extreme right, you will see a "Tiles calculated" column. A blank entry means the calculation has not been done yet.
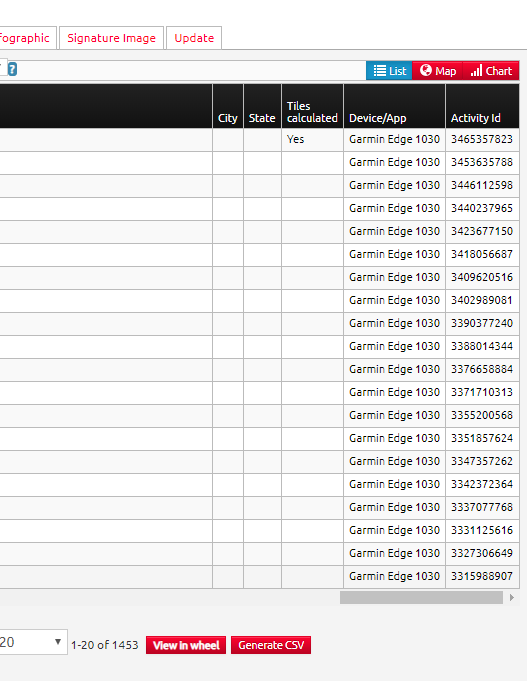
Use the 'Tiles calculated' field to be sure your tiles have calculated quickly.